
Creating designs for correct specification for print
WEEK 1//ILLUSTRATOR
WEEK 2//PHOTOSHOP
WEEK 3//INDESIGN
WEEK 4//COMBINATION

"process colours"
SWATCHES AND APPLICATION OF COLOUR IN ILLUSTRATOR
Ways to apply swatches:
* Sliders (CMYK/Colour tab)
* Swatches
* Top left fill swatches
CREATE YOUR OWN SWATCH PALETTE


* Delete all default swatches (click on swatch>>put in trash).
* Delete any "stray" swatches that may have been left over that you don't need.
REGISTRATION
Registration is a pure, rich black which is made using CMYK 100%.
Registration should only be used to create print marks on your printed media to evaluate the richness of the colour.
Trim marks/registration marks & colour bars/removed once work is trimmed.
Used in screen printing to align for multiple colours in the screen printing process, along with true grain paper test printing.
CMYK LAYERS
Greyscale images which specify the particular colour channel ink for each layer.
Registration marks will appear on C/M/Y/K separations (positives), then used to register during the print process.
DON'T use registration for your artwork- use black.
Registration can result in very wet ink, bleeds from your type or image work and poor alignment. Only use for print marks.
CREATE NEW SWATCHES


Colour palette>CMYK slider>Pick Colour>Swatch Menu>Create New Swatch
OR
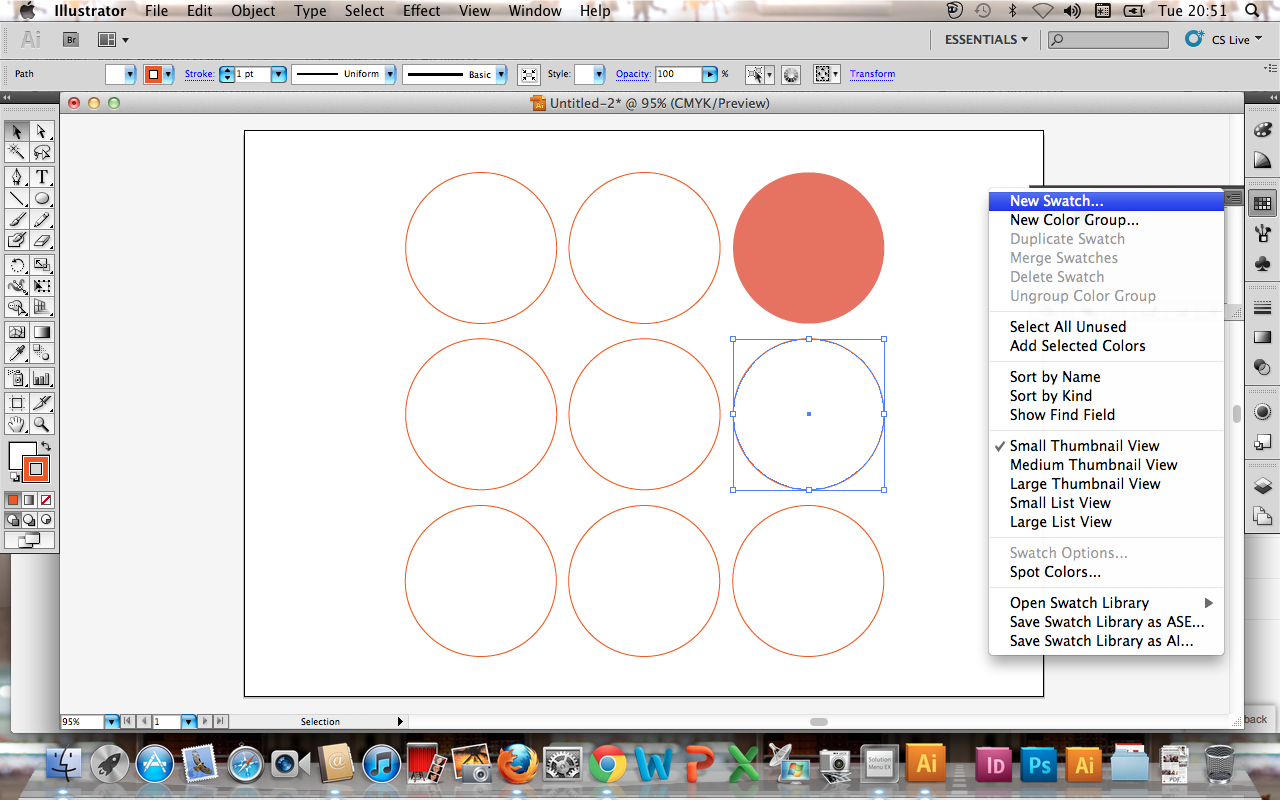

Swatch palette>Create new swatch>Pick Colour>OK
TO CHANGE SWATCH MENU


Swatch palette>Menu drop down>List view (Small/Large)
DUPLICATING SWATCHES


* 'Global' means that any changes that are made to this swatch colour will effect every single use of that swatch on the page from this point onward.
* A 'Non-Global' colour will not affect the other swatches, as there is no link.


SPOT COLOURS
* A spot colour is a single colour that only requires a single printing plate.
* A colour that is applied using it's own printing plate. Ready mixed- not using CMYK. NOT A
PROCESS COLOUR.
* Use spot colours is they are outside the CMYK gammut (very bright, fluorescent, etc).
* Spot colours also reduce costs for low colour swatch numbers (4 or below- no need for CMYK), cheaper to produce.
* To print CMYK when screen printing, you would need 4 separate screens. Spot colours result in less time exhausted, less money spent, less printing plates. If you need more than 4 spot colours, CMYK can often be a more financially viable alternative.
* Spot colours are also used for corporate or branding colours. This means the colours are EXACTLY the same (a way to be sure that brand identity is consistent).
* Spot colours can be referenced uniquely (PANTONE- varying colour systems dependent on stock, coated, uncoated). You can be referenced this number by your client, or search yourself in a PANTONE guide (physical or digital). This allows you to be accurate and consistent.
RETRIEVE SPOT COLOURS

PANTONE solid= spot colour
PANTONE process= CMYK
COATED/UNCOATED= paper stock determines

* When you have the swatch menu open, view in "List view" for a more manageable overview.
* Go to the drop down menu and select 'Show find field' to allow you to type in the PANTONE number and select the correct spot colour easily.
* Swatches are labelled with their ref. name... DON'T change the name (it'll only confuse you)
* You can also create tints (as previously shown) when clicking on these swatches.

THE ONLY WAY TO PRINT SPOT COLOURS ACCURATELY IS TO USE THE COMMERCIAL PRINTERS. LASER PRINTERS WILL CONVERT THEM TO CMYK
When you create a new document, the swatch palette will revert back to the original/standardised AI swatches.
HOW TO SAVE SWATCHES

This will now be available from any (Uni) computer.
HOW TO FIND SAVED SWATCHES
New document>Swatch menu>Open swatch library>User defined>Select.
SAVING AS ADOBE ASE ALLOWS THE PALETTE TO BE TRANSFERRED WITHIN ADOBE PROGRAMMES. GRADIENTS, TINTS AND PATTERNS, HOWEVER, ARE NOT AVAILABLE OUTSIDE OF ILLUSTRATOR.
TO PRODUCE COLOUR SEPERATIONS

(NOT
AVAILABLE FOR VIEW/EDITING ON MY MAC, DUE TO PRINTER'S INK SYSTEM-
AVAILABLE THROUGH SEPERATE CMYK CARTRIDGE PRINTERS, NOT COMBI)
* Seperate, not composite
* Each colour represented by it's greyscale.
Print menu>Output>Mode>Seperations
* This creates individual seperation sheets- C/M/Y/K plus spot colours on individual sheets.
No comments:
Post a Comment