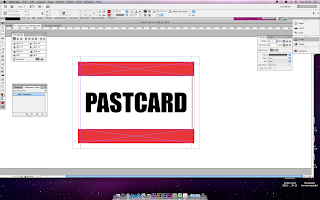
Notes from today's print workshop with technician/tutor, Mike Flower.
NOTES
//
* Out putting PDFs...
Adobe PDF Presets > Press Quality (going to print), Smallest File Size (For proofs to clients, emails, etc), High Quality Print (Digital and laser, not quite good enough for commercial print).
* Individual printers will have different requirements.
* Make sure all images are CMYK (will automatically occur when you save as print PDF- stays as RGB for interactive- only for pre press).
* Include bleed in PDF
* Make PostScript file through Print... Use print dialogue box... Printer... PostScript file.
* PostScript can make positives when screen printing (in digital print resource- can make A2 separations, only available when working with a PostScript File/Printer- does not work with inkjet printers).
* Come and ask Mike for file to copy if we want it on our computers/laptops at a later date.
* Save PostScript file as a PS file.
* Make PDF file of printers spreads...
> Print Booklet > Adobe Settings > PostScript File > Adobe PDF 9.0 (You dont' see a preview in print booklet) > Save printer's spreads (now available) > Drag into Acrobat Distiller to turn it into a PDF based on PDF quality settings.
* Working with multiple images on a page...
> Save image/export as press quality PDF with bleed and crop marks.
> To place PDF... File > Place > Open... Creating an InDesign file within an InDesign file (InDesign INCEPTION).
> Edit > Step and repeat, layout repeated, images in a gridded structure.
> Double- sided, 2 page A2, print in digital print- would need to centre it in the page.
> Align to centre of the page.
> Click 'Align to page' and then horizontal and vertical alignment (Images need to be grouped as one object).
* If you notice (possible scenario) and need to make an edit...
> Rather than using PDF > File > Place > InDesign File... can place one InDesign file in another.
> YOU CANNOT PLACE A POSTSCRIPT FILE.
> When placing InDesign files click 'Show Import Options'.
> Bleed will be excluded- use the bleed bounding box to include the bleed- can't include crop marks (unlike a PDF...the advantage), therefore, we go to the original InDesign file to add crop marks.
> Use the 'slug' bounding box option.
> To edit document... File > Document Settings > Add 10mm slug all round (add your own crop marks).
* If your mouse is over the page, the guide will only fit the page/image, off the image/page for guides off the doc.
* Update file (original) and then double click warning triangle in links palette to update the links in the new file.
* Open > Place > PDF (8 page booklet).
> PDF files are like AI files- when there's nothing in the page, it will be classed as a transparent background.
* Acrobat symbol and + means there's more than one page to place.
* To insert symbols...
> Either go through Type > Glyphs, or...
> System Preferences > Language & Text > Input Sources > Keyboard & Character Viewer... Gives you the option for shortcuts and for selecting symbols and glyphs (highlighted for accents, etc).


No comments:
Post a Comment