Notes from today's print workshop (2/4), as presented by design for print technician, Mike Flower. Documented with screenshots of the progress and tasks carried out through this morning's session.
//
NOTES
Print Workshop II/IV
Consistency & Efficiency
- Working through large InDesign documents.
- Looking at paragraph formatting.
* "Show hidden characters" in type menu will show you the paragraph end/symbols (dots, asterisk cross symbols, etc). Examples of hidden characters are turned off when working on usually formatting text, but can be jumped between simply.
* This is good for collaborative work to understand the layout/format thus far.
* Edit... Find/Change, ensures you can search and edit elements of the text.
* Master pages used for consistency throughout the document- drag and drop onto individual pages for documentation.
* Find/Change remove two paragraphs returns to make one (see s/shot).
* 'Change' buttons proceeds to edit.
* 'Change All' applies to, and edits all.
* Paragraph palette (through type menu) contains everything we need to format paragraphs.
* We don't need to highlight the text to edit a paragraph, we just need to click within it.
* Use the 'space after' button to edit spacing on the page in mm. Can also use 'space before' on the lower body of text. Use this consistently throughout your document.
* We can indent text, useful for documents such as dissertations/drop quotes.
* Drop caps can be applied through the same paragraph palette.
* To reverse out your type go through palette menu... paragraph rules, allows you to make edits to the text such as stroke, offset and colour. This can not be applied where there isn't a paragraph return.
* 'Keep options' in paragraph palette menu is useful when setting a lot of text.
* Working with columns- don't widow words in your text- a separate heading is regarded to as an 'an orphan' (title left at the bottom of a page- visually "awkward").
* In 'Keep Options' 'keep with previous/next number of lines' ensures that the headings are kept with the body copy of the text.
* Can also apply this to an entire highlighted paragraph.
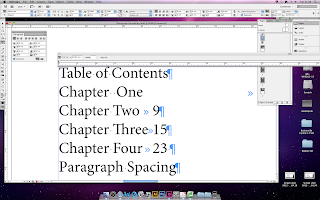
* When pressing tab, we need to specify the measure of the tab. Type > Tabs menu. Aligns with paragraph and copy we are currently working with. Can move an exact distance, or manually move the tab cursor across.
* Type a character into the leader field box to create a filler between the tabs, eg .....1.
* If you press Shift + Return you create a 'soft return' staying on a new line, but within the same paragraph.
* Consistently format headings (save as 'paragraph style'- Type > Paragraph Styles). Paragraph styles palette menu > New paragraph style.
* General paragraph styles shortcut (Press function key Cmd + Keypad 1), now saved as paragraph style in menu- click onto the new heading/specific text to change and apply this new style.
* Double click on style- goes through to styles menu- e.g. character colour/tint/weight, etc. will be changed to the highlighted text.
* Hanging heading- heading which lies to the left of the body fo text- press Cmd + \ to intend the body of text to the right of the hanging heading to align (or insert special character > indent> indent to here [through type drop down menu]).


No comments:
Post a Comment